SRB2 Level Editing Made Easy
Connecting the Two Sectors
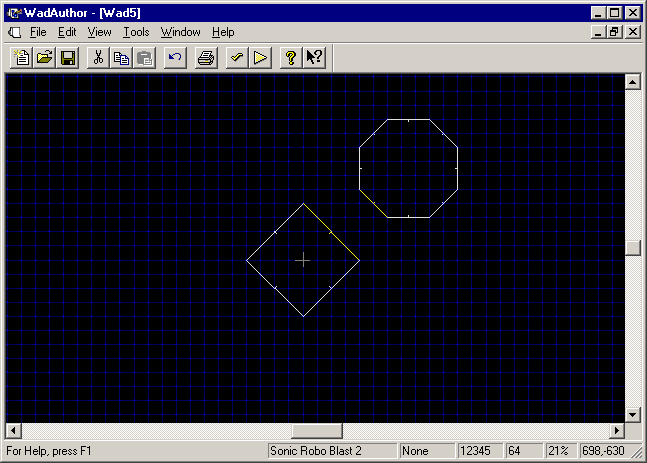
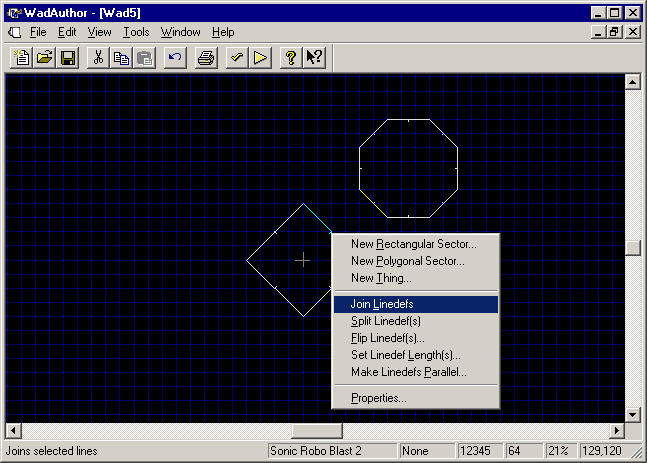
Let's say we want to connect the diamond sector to the octagon sector. You'll understand why we would want to do this soon, when I explain what all this coordinate stuff really means. For now, assume it's just because that would look pretty. Move the octagon sector so it's above and to the right of the diamond sector, if you haven't already, so everything looks about the same as my last screenshot above. Then select the lower-left linedef of the octagon:
Also select the upper-right linedef of the diamond (remember, hold Ctrl to select multiple objects at once):
Right-click on the upper-left linedef of the diamond sector (which is already selected) and choose Join Linedefs:

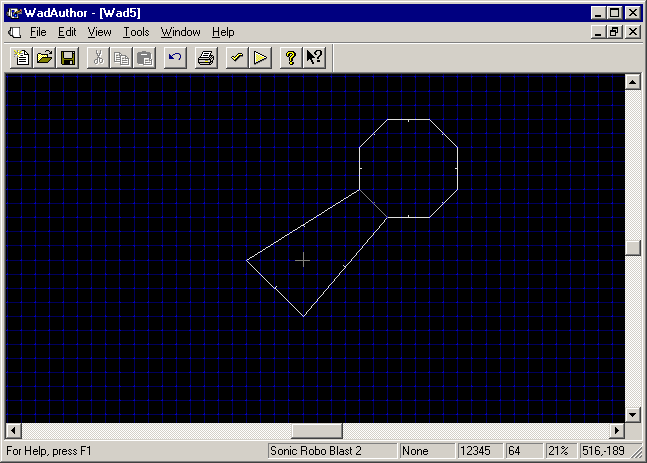
The two sectors are connected, as you can see. The linedefs you had selected became one, and it's now grey. Grey linedefs are two-sided; there are sectors on both sides of them.
| Let me rudely interrupt you now
for a very important note.
Please, please make sure you understand how that linedef joining works!
It is crucially important that you understand how to join linedefs.
Since I wrote the first version of this guide, I've found that some
people are just moving lines
next to each other, instead of actually joining the lines, and later
wondering why they get glitches. Linedefs will not magically join themselves if you
plop two of them down next to each other. You have to join them, and
you have to do it explicitly! |
The space between the two sectors was taken up by the (formerly) octagon-shaped sector, because it's the one you selected first. Press Ctrl-Z to undo the last change you made (or select Undo from the Edit menu) and repeat the linedef-joining process, but select the same two linedefs in the opposite order:
See how the space between the two sectors is now taken up by the (formerly) diamond-shaped sector? That's because you selected it first this time. The linedef you select first is the one that moves.