SRB2 Level Editing Made Easy
Making Water
Let's create a small level with a pool of water to swim in. Swimmy swimmy!Create a new wad. Yes, we're working from scratch this time. Do the stuff you have to do with every new wad, then make a rectangular sector around the origin with width and height of 1536. It'll be our thok barrier. Remember when I mentioned the "huge square" technique of making thok barriers? Set it up as follows:
Ceiling Image: F_SKY1
Ceiling Height: 576
Floor Image: FLOOR0_3
Floor Height: 576
Then create a new rectangular sector inside that one with width and height of 1408 and set it up like this:
Ceiling Image: F_SKY1
Ceiling Height: 4096
Floor Image: FLOOR0_6
Floor Height: 512
Since the first sector we made, sector 0, is going to be our thok barrier sector, select all four of the two-sided (grey) linedefs, and set the below texture on their front sidedefs to GFZROCK. Since we're pulling the old F_SKY1-as-the-ceiling-of-both-the-thok-barrier-and-the-sector-that-touches-it trick to make an open-air level, we don't need to bother with any above textures.
Now make yet another square sector in the middle of the second one, this time with side lengths of 1280. Set it up like this:
Ceiling Image: F_SKY1
Ceiling Height: 4096
Floor Image: FLOOR0_3
Floor Height: 64
Sector Tag: 1
Huh? What's that Sector Tag? That's a new setting you have to use to make water (and many other cool effects). You'll see.
Now select all four of the linedefs touching the innermost square (the third one you made), and set the below texture of their front sidedefs to GFZROCK. Then set them all to Lower Unpegged and make them have GFZGRASS main textures on both sides. (That last part will create sector borders, which you learned about in Section 14.)
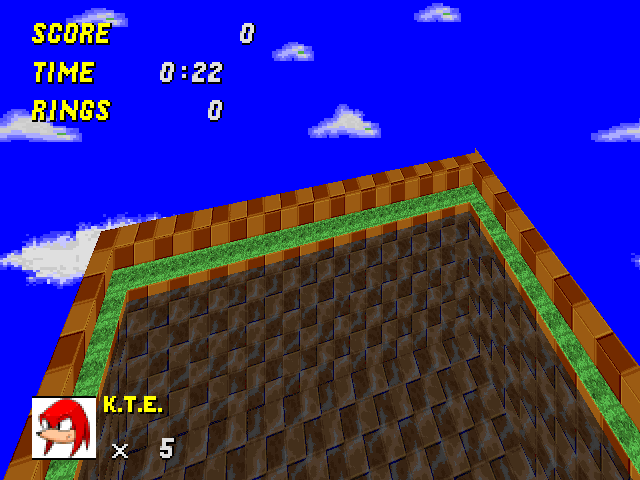
Add a Player 1 Start somewhere on the second square from the outside, and a red spring somewhere in the innermost square. Save (I'll use the filename thirdlevel.wad) and play. Your level layout should look similar to this:
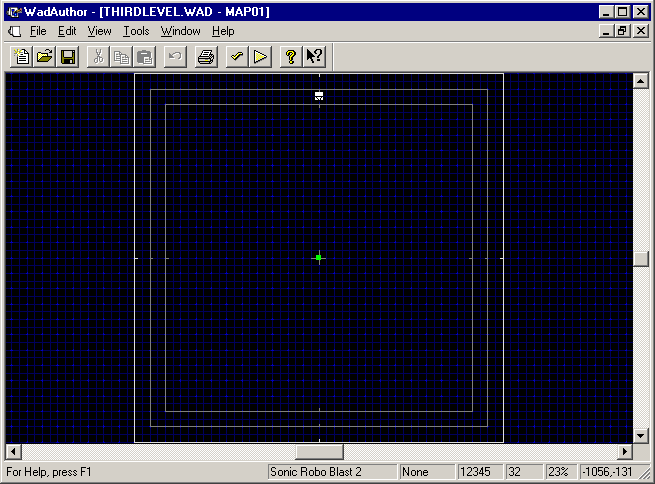
(Remember to decrease the grid to put in that Player 1 Start.)
Surprise! Your level still doesn't have any water! Did you think it would? Nope. Setting that Sector Tag was only the first step in the long and seemingly tedious (though it'll be nothing once you get used to it) process of adding water.
Make a new sector, on the outside of your main level, with a small size — say 64x64:
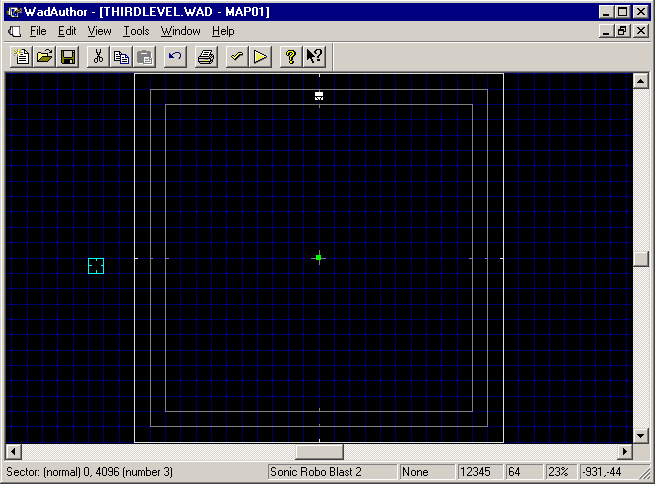
Set that new sector up like this:
Ceiling Image: FWATER1
Ceiling Height: 480 (Incidentally, that's 512 - 32.)
Floor Image: FWATER1 (Actually, it doesn't really matter in this case, but just use FWATER1 for the floor image and shut up.)
Floor Height: 32 (Incidentally, that's 64 - 32.)
Now select a linedef on the small sector — doesn't matter which linedef — and open its Properties. In the Class listbox you previously paid no attention to, select Water. In the Type listbox, select Water Block (Translucent). And in the Sector Tag box (lower right corner), set the Sector Tag to 1 — same tag you set the innermost square in the main level to:
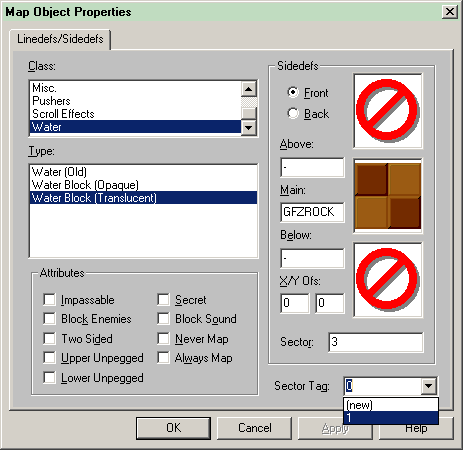
Press OK, save, and play the level:
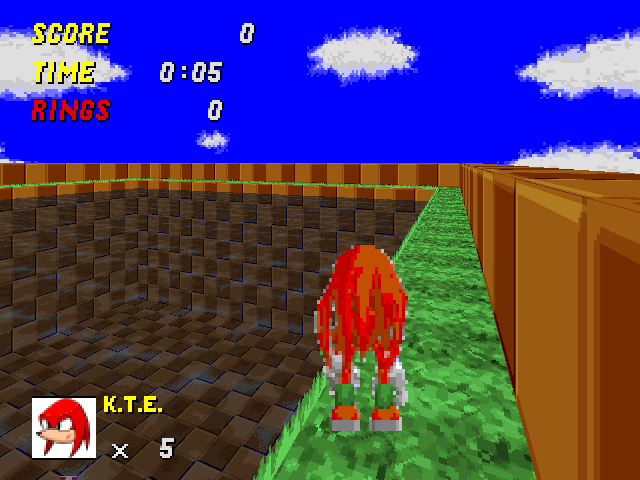
Water at last! Unfortunately, the colouring doesn't look right:
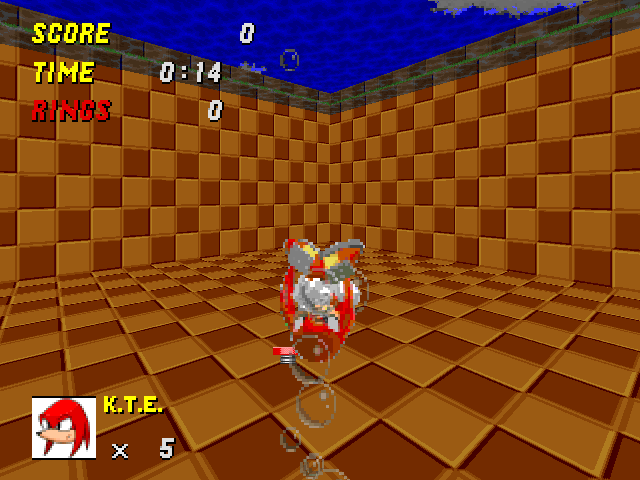
You can tell you're underwater because of the air bubbles. We'll get to colour mapping soon. Then you'll be able to make it look right underwater.
Notice how high up the spring propels you:
Whoo! Quite a fall there. In fact, the underwater red spring propels you more than 2560 units up into the air. Gravity is lessened underwater. In any case, you will almost never want to use a red spring underwater. Try a yellow spring instead.
At this point, let me try to explain how this all works.
A "Sector Tag" (commonly just called a tag) is a way to tie several linedefs and/or sectors together. There are some special tag numbers, but in this case, the tag number is immaterial (tags 1-99 are all general purpose). We used 1 because it's the first tag number and seems a logical choice.
With tag number 1, we tied together one linedef and one sector. If you mouse-over the linedef, the sector lights up in green, and vice versa. That indicates that they belong to the same tag. You can view a list of things we tagged together by right-clicking on the linedef or the sector and choosing Edit Tags. (You can also add and remove objects from tags using the Edit Tags window, hence the name, but I don't recommend doing it that way.)
The sector we tagged is what I call the affected sector. It's the sector in which the special effect we used actually takes place. It's also sometimes called the target sector.
The linedef we tagged is called the control linedef. It has a particular linedef type, namely Water Block (Translucent) from the Water class. (By the way, if you ever need opaque water, you can use Water Block (Opaque) instead.)
The control linedef belongs to a sector, and that sector is called the control sector. Here the control sector determines the height of the water. The control sector's ceiling height is the top of the water, and the control sector's floor height is the bottom of the water. In this map, we set the bottom of the water to be below the bottom of the affected sector, so that as far as the player is concerned, there is no bottom to the water. If you wanted to make the water defy gravity and float in the air, you could set it to something higher, like 256.
In SRB2, for almost all special effects that use tags, the linedefs with a tag are all control linedefs and the sectors with a tag are all affected sectors. In our example here, we only used one control linedef — because we only wanted one effect, water — and only one affected sector. But we could've had multiple effects in one sector by having multiple control linedefs, or one effect in several different sectors by having multiple affected sectors, or several effects in several sectors by adding both.